unit 4 illustrator

this screenshot shows how i can have multiple canvases in one page and that i can change the canvases to different sizes.
i was learning about the feature know as drop shadow.
i was learning about the trace feature. i use layer for the trace; one layer is locked so it can't be changed another layer is put on top of the first one and this layer allows me to see through it into the first layer so i can draw on top of the second layer.
i was learning about the trace feature. i use layer for the trace; one layer is locked so it can’t be changed another layer is put on top of the first one and this layer allows me to see through it into the first layer so i can draw on top of the second layer.
i learned about the different brushes i have access to and that i can draw across art boards.
this is me trying out the 3D feature. first i made a 2D shape then i used 3d tool in the effect menu. i learned how the 3d work but it was quit hard at first.
i am trying to morph the shape in different ways, as you can see i have made a simple star shape into a ninja star sort of shape. i did this when i was creating the shape, the directional keys made the star have more edges and more changes.
i used the pathfinder tool to to make the lettering on this logo as you can see the letters looked morphed.
i learned how to use the pen tool and with that knowledge i mapped a skull i found on the internet and used the other tools to edit it.
i was learning about the feature of patterns. i learned that you can create your own patterns and you can get patterns off the library at the bottom on the tab. making patterns are quit difficult but editing them are not. you can enlarge a pattern, move it and etc all inside the shape.
i was learning about the gradient features. It makes different colors into a series of stops along the gradient.
i was learning about the pattern feature I was learning t make my own pattern.
i was learning about the layers and grouping feature in illustrator. i learned this by using other tools like opacity and stroke.
i was learning about the symbol sprayer icon feature. i selected a triangle as my symbol and i started to spray a lot of these symbols as you can see. i also learned hoe to remove the symbols with the same tool by holding the shift button.
i learned about the symbol spinner. the spray when applied rotates the symbols.
i learned about the brush feature or tool. i learned that you can make your own brushes by changing the settings or you can get a many other brushes in the library that comes with illustrator.
i learned about the blob brush i created a object ( the ghost from pac man) and i made that object a brush a blob brush.
i learned about the different borders in the illustrator and how i can make my own or fine one in the library.
i learned the lineament feature found in the effects menu. it can put a group of objects into a line depending on your criteria like all the objects will line up to the top most object.
i learned about the warp feature. i could warp an object with the keyboard shortcut shift+R.
i learned about the rotate feature. this allows me to make an object rotate in a way that fits me, i can change the angel it rotate as you can see on the surf board. i can also use this feature to make things look like they have a shadow like the man: i copied the man and rotated the man in a way that it looks like a shadow.
i was learning to crop. crop allows me to cut out a part of an image.
i learned about the blur feature and the warp feature. the blur feature allows me to make a object look like its out line is fogged. the warp feature allows me to manipulate objects and make them look like they have been stretched.
I was learning about the 3D feature extrude and bevel. i learned that you can add some thing on the 3D object so that it a group with the 3D object what i mean by this is that what every you do with the 3D object effects the other object for example there it a design on the surf board so if i change the direction of the light source it will effect both of the objects.
i learned the scribe feature in illustrator. it allow me to make images look like they have been scribbled on.
I was learning about the 3D feature extrude and bevel. this allowed me to take a 2D shape and turn it into a 3D object and change how deep the 3D effect is and more detail changes like where the light sour is and how many there are.
this is the 3D Revolve feature. you draw a 2D object and when you use this feature it makes the object rotate and turn 3D.

photoshop unit 4

Mexico_City_Zocalo_Cathedral
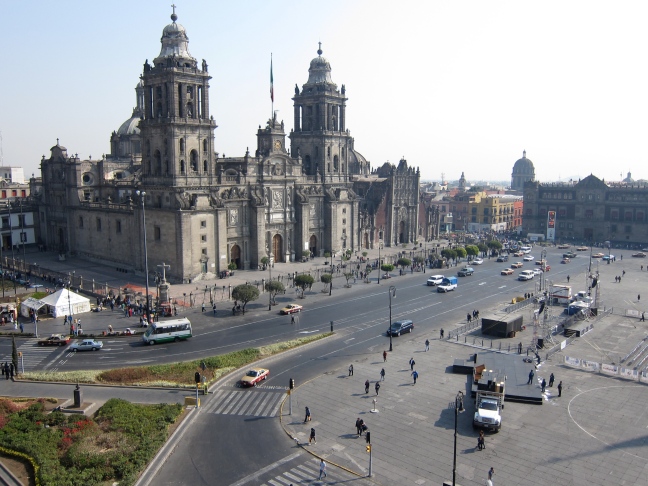
this is the original image i used. this image is going to change a lot over the course of this lesson i had.


Screen Shot 2015-11-24 at 10.04.51
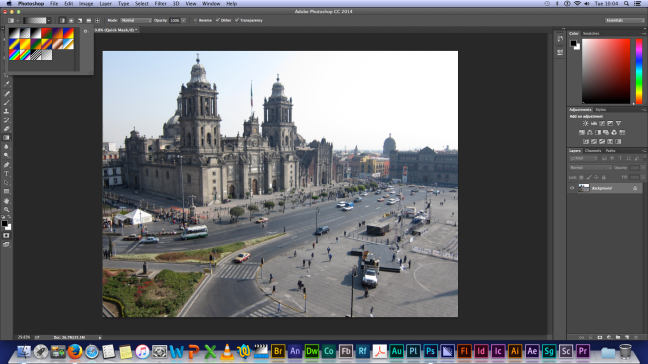
here i used the Gradient tool to create a blur effect on a specific point. i also used a quick mask feature to help with the blur effect.
Screen Shot 2015-11-24 at 10.11.41
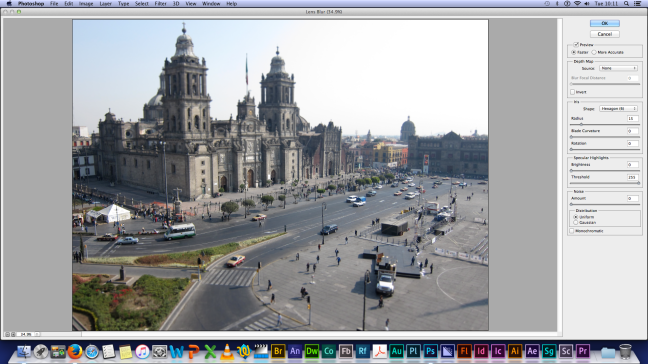
here i changed some of the detailed settings like brightness, black and white and etc.
Screen Shot 2015-11-24 at 10.25.47
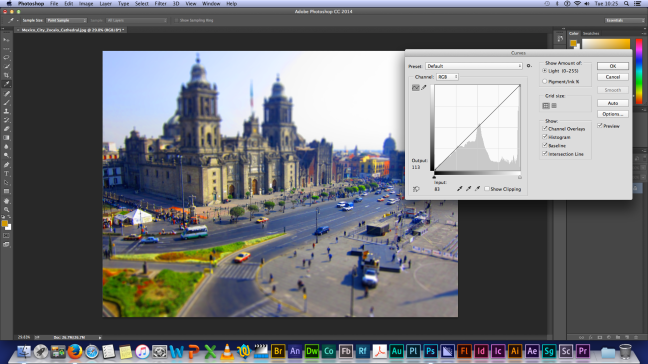
here i am messing around with the hue feature. this feature allows me to create a toy like apprentice. like how David Gilliver
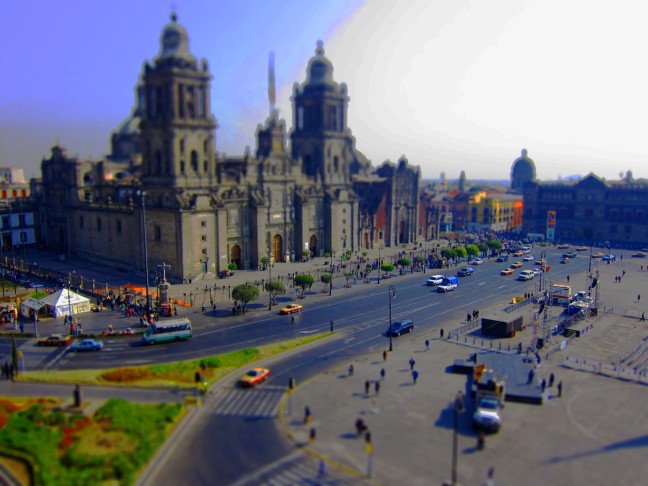
Mexico_City_Zocalo_Cathedral
this is the final product i went back and changed some settings to give it that cool toy looking effect.
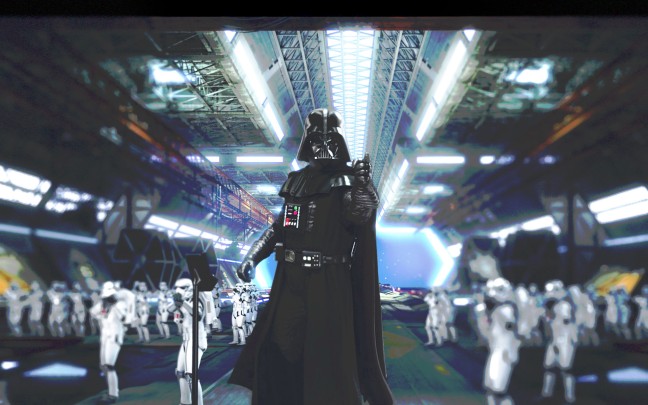
8jnTTjE
here is another i did using the same tools and feature i used in the previous one.

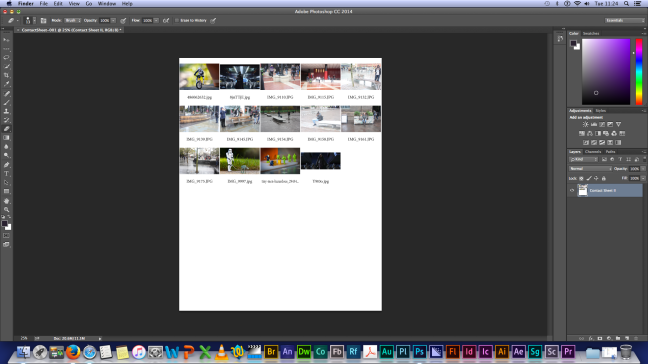
Screen Shot 2015-11-24 at 11.24.49

photoshop unit 4

6987714-black-and-white-photography-portrait-girl
this is the original picture which i will be changing.
Screen Shot 2015-11-17 at 09.41.11
i downloaded a black and white image form the internet for this lesson.
Screen Shot 2015-11-17 at 09.42.09
i learned how to adjust the brush size and the angel, also i learned how to change my brushes to suit my needs.
Screen Shot 2015-11-17 at 10.23.58
i learned how to use the layer features like how to change the opacity of a layer to make some things look like it was part of the image like her skin.
Screen Shot 2015-11-17 at 10.59.31
i learned how to fuse or overlap 2 images together like you see here. i did this by changing the opacity level.
avatar 2.1
this is another example of overlapping layers but this time i made it so that only she is overlapped i did this by using the erase tool. this is called double exposure.

premiere pro unit 7

Screen Shot 2016-01-26 at 10.52.43
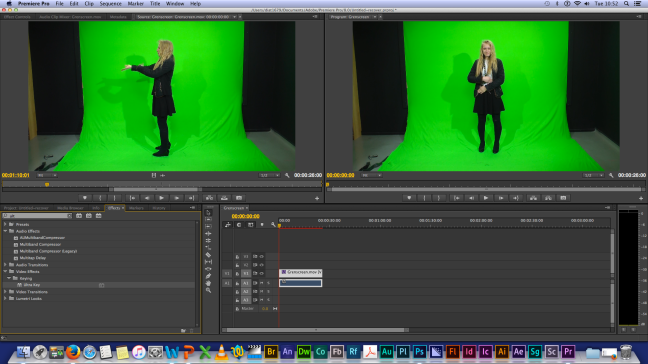
I first started by choosing a short video from a bigger one; by this I mean the teacher gave us a 2hour long video of several people doing thinks in front of a green screen, it was so fun to look at. The green screen is what we will be using in this lesson as we will try to put the person on the green screen on some thing much more better then a green screen. I cut down the clip using the Razor tool.
Screen Shot 2016-01-26 at 11.49.40
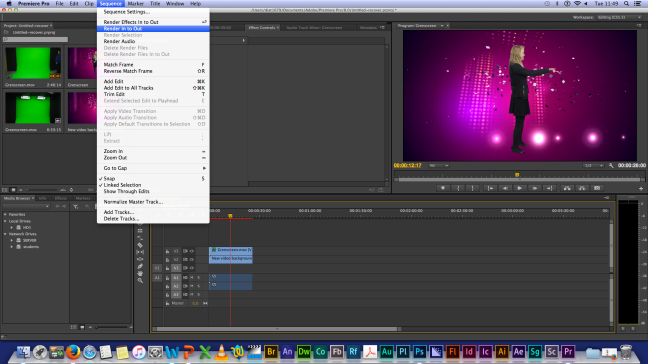
I then downloaded a blackground video from youtube using a website called clip converter. I then used a feature in premier pro that makes the greeen screen invisable and anything over it is put on top of the video that is put under the greeen screen.
Screen Shot 2016-01-26 at 11.40.00
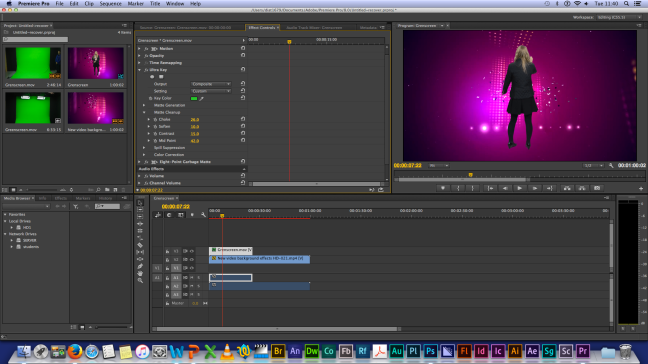
I then prossed to make it look more realistis as possible; i went into effect controls and started to change the effects like opasity, choke, etc.


Integrated time based problem unit 7


Project Brief

This project is all about ‘Soho’ the project requires us to make a promotional video about Soho; it should contain aspects about Soho and what make Soho? That is to put is in laymen terms. This project took us 9 weeks to complete and a tone of photography work and research work ahead of us. The project is a competition held by ‘finish.tv’  were the winner of the competition will get to show their work on a screen is divided into 27 rectangles, so we had to make the video so it fits the screen.

Screen Shot 2016-03-16 at 11.48.55.png

My personal project brief

This project was a group assignment and there were 3 of us. We as a group set out different tasks for each other; my task was computer based so that means I had the pleasure of making the video (which was 80% of the work). My goals were to put our idea onto computer and make it as close to our imagination as possible, this meant watching and learning a tone of tutorial videos. My task contained me learning all sorts of different programs like: adobe Photoshop and adobe after effects, you might be thinking, only two, oh you have no idea. I had to go through all the images and try them all out and see if they would have worked, I also had to come up with solutions on how to fix problems that were related to the computer side of the projects. We had a idea were objects relating to the image or building fly or glide across the screen and then go behind the camera, but the files that contains that animation got corrupted and we con’t use this idea so we left that idea as we didn’t have any time to make another one.

Screen Shot 2016-03-10 at 10.44.16
This was a screen shot taken whiles I was making the video. the program I was using is after effects.I used this program as it was more filmier with this program.
IMG_4986
This was one of the image that I didn’t I use as I thought it was not that exciting and it didn’t have a street.
Screen Shot 2016-03-10 at 10.44.09
This is what the video looks like from  a un rendered point of view, I used this time to take in what I was doning and thinking what i should do next. I did is so I would have a clear mind when i went to the next part of the of the making prosess.
Screen Shot 2016-03-10 at 10.44.39
This show how I made the end log or text for the video. I did this as my personalbrief asked me to and the video needed on as it felt kind of bland and to show the audience were all the images came from.
Screen Shot 2016-03-15 at 11.45.08
I used photoshop to make the image we took in to layers, I did this for each image, EACH IMAGE, there was a lot of images, some we didn’t even used.

This tutorial video thought my how to make the neon sign at the end of the videos; I changed some of the features like “mood”, some of the effects and mostly small things like colour and background.

This video gave me the basics into adobe after effects not that I never used after effect it just to relearn some of the features and recall some thinghs I forgot during the last time I used after effects.


Research on Soho

There are several things that deserve attention; Music has always been primary to Soho; the Café de Paris and the Hippodrome regularly featured American jazz artists in the 30s, and 20 years later Ronnie Scott’s, now one of the world’s most famous jazz venues, opened to great acclaim. It was in Soho that the British skiffle scene first emerged, at the second Soho Fair in 1956 (in the years that followed a skiffle group called The Quarrymen would rename themselves and change the course of musical history). The Marquee Club on Wardour Street witnessed early performances from David Bowie, Rolling Stones, Led Zeppelin and countless others, earning itself the reputation of being the most important venue of its kind in Europe – it was here where execs and artists would meet and forge deals. Numerous bars and cafes accommodated rock stars on a break from recording at one of the studios on Denmark Street, which became known as Tin Pan Alley, named after New York’s famous music street. Café La Giaconda and The Ship pub were two of these places, still in the same spots today.

It was always the intention of the landowners that Soho would become a fashionable area, attractive to the wealthy and influential cream of London. Neighbouring districts such as Bloomsbury , Marylebone and Mayfair had been developed on a grand scale and had successfully bloomed into very desirable districts. However, the plan failed and the few wealthy aristocrats that had made their home in Soho eventually sold up and moved on. The area became inhabited by immigrants. The Huguenot from France founded the French Church in Soho Square in the 17th century. The character of Soho began to change as the money moved out and theatre houses and drinking dens moved in. Along with the music halls and theatres came prostitutes and by the mid 19th century Soho was firmly associated with the more colourful aspects of life!

Project planning

The project at first looked very complex; going out, taking pictures and making a promo video, this was all over whelming at first, but after we took a step back it was not that all complicated, given some part were still complex like the image gathering, we still powered through it.  The planning first started when we began, on our own creating an idea for the video, after that we decided the individual roles we will be having for example I am responsible for the actual making of the video, we also discussed how we will be carrying  out our individual tasks; what programs we will be using? And what we have to research? The one major detail we didn’t plan was timing; the time we needed was non existing, so when we came to the end of the 9 week project we panicked and didn’t know what to do, for a while, but we pulled our self’s together and completed the project.

Week 1 to learn about the project and the concept behind the competition; to learn about the project

Week 2 learn about Soho and come up with an idea for the video like format. Disuses what to do with the group and what we as individuals should have bring to this project like personal roles.

Week 3 go out and take pictures of Soho and sort out all the pictures I will be using. Developing the concept idea even further. Learning how and what programs I will be using.

Week 4 Start working on the video using the programs I selected last week.

Week 5 Start working on the video using the programs I selected last week.

Week 6 Start working on the video using the programs I selected last week.

Week 7 work on the blog; make the blog more presentable

Week 8 work on the blog; make the blog more presentable

Week 9 work on the evaluation on the final video


Idea development

First we discussed what the videos format was going to be; what I mean by this is was it going to be a slid show type of video or was is going to be a walking through Soho type of video. We ended up picking the walking concept, as it felt like it was an out of the box idea. What do we need to make it out of the ordinary? That was the question that we asked our self, so we decided to use photos instead of  film as we thought it would be out of the box, concept.This seemed very easy as we were talking about it, but oh boy were we in for it.

This helped us with the idea development as i felt like it gave us a more in-depth view into the idea we were going for.

The second thing we did was to find aspects of Soho that we were going to use; we chose the aspect of student life, we then broke  it down into different  places or aspects  that the “student life” might take place in and they are: gaming, fashion, theatre, restaurants and bars. These were the aspects or places we had to look out for when we went to Soho to take photos of the place. This made your job of taking photos much more organized, quick and easy as we knew what we were look for.

IMG_9993
This is a picture of  a theater that we took while roming around, we were luck to find this as we were just about to give up our search.
IMG_5009
The pub represented the late night life

We then researched the places we were going to visit while we were in Soho. We used tourist websites to find these places, it helped a lot in your quest to find set places as we had some roust planed out before we went outside into Soho, but eventually we just ignored it, went out and started roaming Soho; went we came across the buildings we need we took pictures of them and any that we found interesting.

Most of the pictures we took where not used in this project, it was a bit frustrating to see the time you spent out side in the cold and rain be wasted like that, but the one we didn’t use ether didn’t have  the the aspects we need o were just not up to the quality we need.

IMG_4906
Another theater but this was more  crowed then the other one, this theater was near to china town,maby be that is why it is so crowed.
IMG_4854
This is a arcade that we found while we were walking,we took several pictures this arcarde from different angle but this is the one that we used.
IMG_1456
This is a example of a image we didn’t use as it had only buildings that were not relevant to our theme.


Development in techniques/ experience

In the span of this project I have learned a lot of skill and all of these skill I a am very great full for, I have loved working on this project even thou some part of it was somewhat difficult, it was still fun and challenging. I learned how to use all sort of programs to my UT most abilities and how to make videos. This experience will help me a lot in the future when it comes to computers and the programs I have just learned. I will greatly benefited from these newly acquired skills and experience.

The possess of gaining these new skill was difficult and time consuming. I had to learning form a lot of tutorial videos and I also had to learn from asking my teacher and looking at other people use the same program.


 managing project and past production

We managed the project my coming on off days and staying after lessons to complet soome of the work  we were doning. After each lesson we had on the sprit of Soho  we planed what we should do next and when we should come to college and what what work we should consentrate while we were in college.


Evaluation of the video “Sprite of Soho Sprit of Soho”

This project is all about ‘Soho’ the project requires us to make a promotional video about Soho; it should contain aspects about Soho and what make Soho? Basically. This project took us 9 weeks to complete and a tone of photography work. The project is a competition were the winner of the competition will get to show their work on a screen is divided into 27 rectangles, so we had to make the video so it fits the screen.
This project was a grouped basic project. My group contained 3 people including me. Our objectives were to ‘make a promotional video for the competition’. First we discussed what the videos format was going to be; what I mean by this is was it going to be a slid show type of video or was is going to be a walking simulation type of video. We ended up picking the walking concept, as it felt like it was an out of the box idea. What do we need to make it out standing? That was the question that we asked our self, so we decided to use photos instead on film as we thought it would be out of the box concept. After I got the images I stared making them into layer in Photoshop and put them in after effects to make a video out of them; it took a long time.
The finished video is very complex and took me a lot of time to make and I am quite pleased with the finished product, I wish that I had a better grasp of   after effects, and Photoshop as I felt that I could have made the video a bit more interesting that it is now, but I am still happy with the video I produced.
I really liked the way that I used the images to make the waking illusion with layer, it gives it that augmented reality feel to it. The video is very bright and vibrant in colour, it has a lot of moving parts that gives the video life and makes it looks one of a kind. I love the end part of the video where the Soho text is shown in a neon text; this makes it look very eye catching and interesting, it leaves you with a ‘wow’ text around your eyes.
I thought that the execution of this video could have been a bit better in a sense that it could have been more professional looking and more realistic feeling; it felt like it was a slide show shown sideways. I really wanted to make the neon text a bit more realistic and interesting. I could have made the sky and the ground looks more interesting and not slapped on like a really crappy slide show.
All in all I am happy and pleased with myself in creating such a good-looking video. I felt like I completed it in the time I was given and made an outstanding video.”

This is my final out come as you can see it is on youtube.


unit 7

Black lagoon opening segment. It might be in Japaneses but it still counts as a opening. The opening song “Red Faction” is a punkish rock number with Engrish lyrics that borrow copiously from punk rock, action movies, and anything else with a bad-ass ‘tude. Cliches like “No one lives forever,” “Get a good head on your shoulders,” and “They make me violate them,” are strung together, and while it’s so senseless and earnest that it’s unintentionally hilarious, there’s a little something more to it than that. It’s a song about being a bad-ass, but on borrowed terms from another culture. The opening describes the show in its full uncensored form.

Kim Possible is arguably the most successful Disney Original Series to date, it aired for the longest time, for 5 years, between 2002 to 2007 and this opining dose  not disappoint; the opening show more that enough to get some one hocked. This is one of the openings that I really love and  still remember to this day.Kim Possible’s artwork manages to be original and eye catching, with a variety of costumes, hair styles, vibrant colors and locations.The animation is above average for this style of production. Character designs for Disney cartoons tend to vary in detail and originality

everyday accounts

this screenshot shows how i can have multiple canvases in one page and that i can change the canvases to different sizes.
i am trying to morph the shape in different ways, as you can see i have made a simple star shape into a ninja star sort of shape. i did this when i was creating the shape, the directional keys made the star have more edges and more changes.
this is me trying out the 3D feature. first i made a 2D  shape then i used  3d tool in the effect menu. i learned how the 3d work but it was quit hard at first.
this is me trying out the 3D feature. first i made a 2D shape then i used 3d tool in the effect menu. i learned how the 3d work but it was quit hard at first.
i learned about the brushes and that you can have more then one brush. you can find more brushes in the library in the bottom of the tab.
i was learning the strokes and fills of illustrator.
i used the pathfinder tool to to make the lettering on this logo as you can see the letters looked morphed.
i learned how to use the pen tool and with that knowledge i mapped a skull i found on the internet and used the other tools to edit it.
i was learning about the feature of patterns. i learned that you can create your own patterns and you can get patterns off the library at the bottom on the tab. making patterns are quit difficult but editing them are not. you can enlarge a pattern, move it and etc all inside the shape.
i was learning about the gradient features. It makes different colors into a series of stops along the gradient.
gradient features

After effects unit 7


Screen Shot 2016-01-12 at 10.18.06
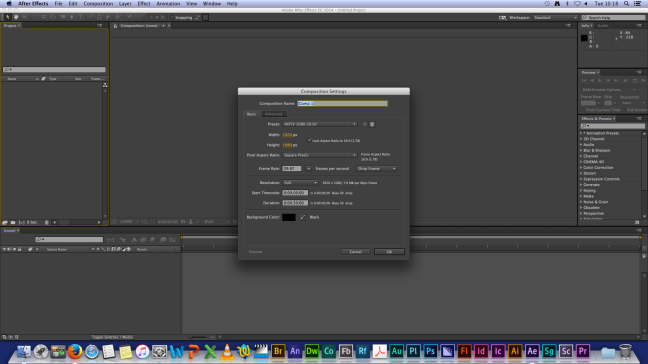
today’s lesson was about ‘after effects’ i opened the program and the first lesson was to know the composing setting . i changed the name of the composition, i changed the duration from 30 s to 6s, i changed the 29.97 fps to 25 fps because it is easier and i changed the background color.  


Screen Shot 2016-01-12 at 10.20.33
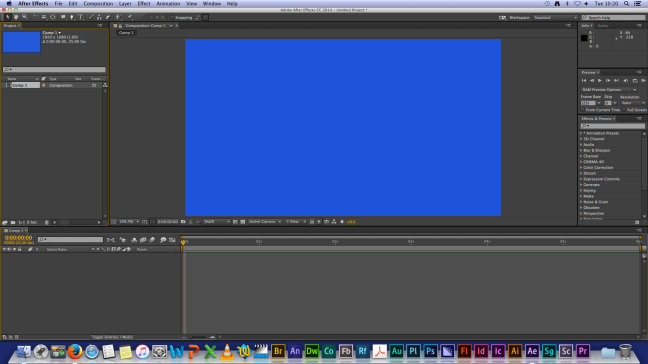
This is what it loos like after the composing setting.
Screen Shot 2016-01-12 at 10.34.36
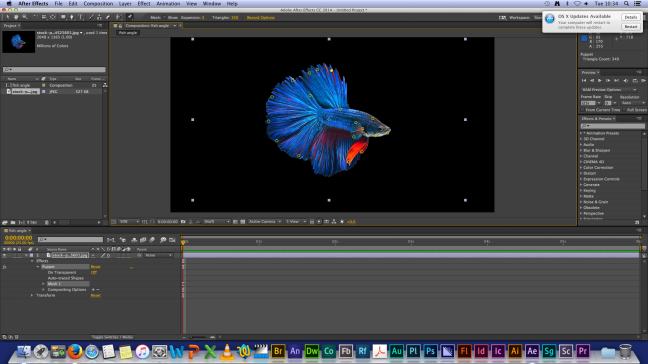
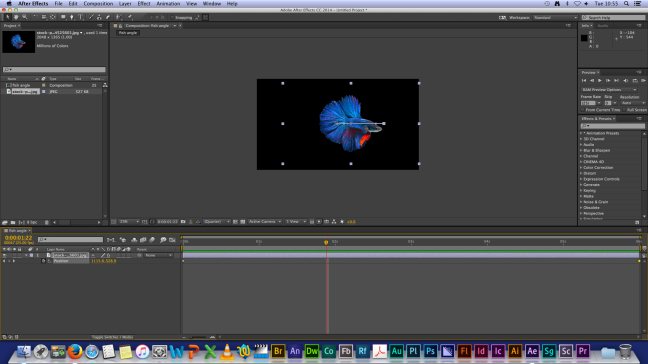
i found a image on the internet about a fish as we will be learning to make it move. I stared by taking the puppet tool and adding pins at key points of the fish so i can make it move by warping.
Screen Shot 2016-01-12 at 10.28.33
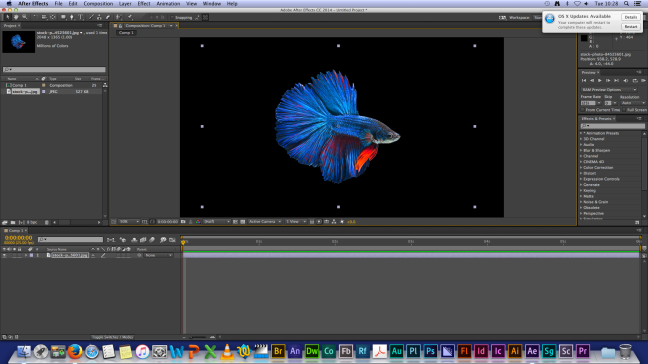
Here I was moving the pins to make it move like a fish while i was moving the pins i was holding alt to make it move so it shows up in the finished clip.
Screen Shot 2016-01-12 at 10.55.06
i learned how to use the key frame feature that lets me move the image to give it more life.